

If you’ve ever dreamed of making fresh, bakery-style bread at home without the complicated steps or long ingredient lists, you’re in for a treat. This 3 Ingredient Artisan Bread recipe is the ultimate solution for home bakers who want simplicity without sacrificing quality. With just flour, yeast, and salt, you can create a loaf that’s golden, crusty on the outside, soft and chewy on the inside, and packed with that classic, rustic flavor that artisan breads are known for.
In this guide, we’ll walk you through everything you need to know—from the ingredients and method to expert tips and frequently asked questions. Whether you’re a beginner or just someone looking for a no-fuss bread recipe, this article is for you.
Why Artisan Bread?
Artisan bread refers to handcrafted bread made using traditional techniques, usually with minimal ingredients and no preservatives. Unlike store-bought bread, artisan bread is known for its crusty exterior, airy crumb, and rich, complex flavor. The best part? You don’t need any special tools or experience to make it at home.
What Makes This Recipe Special?
This recipe strips breadmaking down to its essentials. It focuses on three key ingredients and uses a no-knead, long-fermentation method, which means:
-
Less work (no kneading required)
-
Better flavor (thanks to the long rise time)
-
Incredible texture (crispy crust, soft center)
You don’t need to be a professional baker. All you need is a bowl, a spoon, and a bit of patience.
Ingredients You’ll Need
-
All-Purpose Flour (or Bread Flour) – 3 cups
-
Instant Yeast (or Active Dry Yeast) – ½ teaspoon
-
Salt – 1½ teaspoons
-
Water – About 1½ cups (technically a fourth ingredient, but it’s a staple, so it doesn’t count against the “3”)
That’s it! No eggs, no sugar, no butter—just the basics.
Step-by-Step Instructions
Step 1: Mix the Dough
In a large bowl, combine the flour, yeast, and salt. Add the water and stir until a shaggy dough forms. The dough will look messy and sticky—this is exactly what you want.
Step 2: First Rise (Long Fermentation)
Cover the bowl with plastic wrap or a clean kitchen towel. Let it sit at room temperature for 12 to 18 hours. This slow fermentation is the secret to the deep flavor and airy texture.
Step 3: Shape the Dough
After the first rise, the dough will be bubbly and expanded. Lightly flour your hands and a work surface. Turn out the dough and gently shape it into a round loaf. No kneading necessary—just fold it over a few times.
Step 4: Second Rise
Place the dough on a piece of parchment paper and let it rest for about 30 minutes to an hour. Meanwhile, preheat your oven to 450°F (230°C). If using a Dutch oven, place it in the oven to heat up as well.
Step 5: Bake
Carefully remove the hot Dutch oven and place the dough inside, using the parchment paper to lift it. Cover with the lid and bake for 30 minutes. Then remove the lid and bake for an additional 10 to 15 minutes to develop a golden, crackly crust.
Step 6: Cool and Serve
Let the bread cool on a wire rack for at least 20–30 minutes before slicing. This helps the inside finish setting and improves texture.

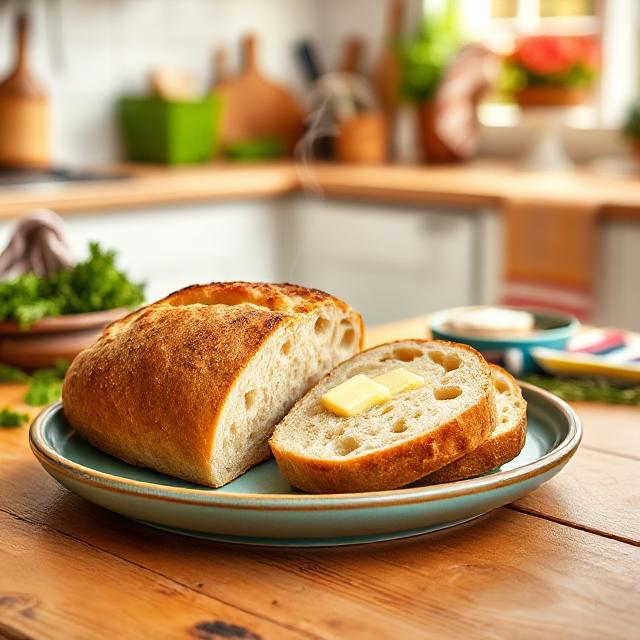
What to Expect
-
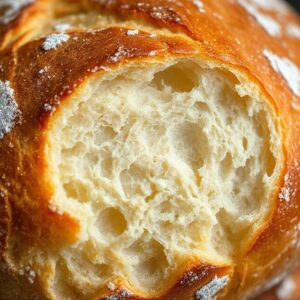
A rustic, golden-brown crust
-
A chewy, moist crumb with airy pockets
-
A subtle, savory flavor that pairs well with butter, olive oil, soups, or even jam
Tips for Perfect Artisan Bread
-
Use warm water (not hot) to help the yeast activate properly.
-
Don’t rush the process. The long rest time is crucial for flavor and structure.
-
Use parchment paper to avoid sticking and for easy transfer.
-
If you don’t have a Dutch oven, use a baking stone or sheet with a metal pan of water in the oven to create steam.
-
Experiment with add-ins like herbs, garlic, or cheese once you’re comfortable with the basic version.
Why It Works for Everyone
This bread recipe is ideal for:
-
Busy home cooks
-
Beginner bakers
-
Families looking for fresh, preservative-free food
-
Anyone who wants to enjoy real bread with minimal effort
It also aligns well with clean-eating lifestyles, and it’s naturally vegan and dairy-free.
15 Frequently Asked Questions (FAQs)
-
Can I use whole wheat flour instead of all-purpose flour?
Yes, but the texture will be denser. You can try a 50/50 mix of all-purpose and whole wheat for better results. -
Do I have to use a Dutch oven?
Not necessarily. A baking sheet or loaf pan with a pan of hot water in the oven for steam can work, though the crust won’t be as crisp. -
Can I use active dry yeast instead of instant yeast?
Yes, just dissolve it in the water first and let it sit for 5–10 minutes before mixing with flour and salt. -
How long will this bread stay fresh?
It’s best eaten within 2 days. You can store it in a paper bag or wrap in a clean towel. Avoid plastic, which softens the crust. -
Can I freeze this bread?
Absolutely. Slice it first for easier toasting later. Wrap tightly in foil and then place in a freezer-safe bag. -
What happens if I let it rise longer than 18 hours?
It may overproof and collapse slightly. Stick within the 12–18 hour window for best results. -
Can I make the dough ahead of time?
Yes. After the first rise, refrigerate it for up to 2 days before baking. -
How do I know when the bread is fully baked?
The crust should be golden and hard. Tap the bottom—it should sound hollow. Internal temperature should be around 200°F (93°C). -
Is this recipe vegan?
Yes, it contains no animal products. -
Can I add flavors or mix-ins?
Yes. Try herbs, roasted garlic, shredded cheese, or olives. Add them after the first mix. -
Why is my dough too wet or too dry?
Humidity, flour type, and measurement accuracy matter. Adjust by adding a little more flour or water as needed. -
Can I use sourdough starter instead of yeast?
Yes, but you’ll need a different fermentation schedule. It’s great for adding tangy flavor. -
Why didn’t my bread rise?
Your yeast might be expired, or the water was too hot and killed it. Always check your yeast before use. -
What’s the best way to slice this bread?
Use a serrated bread knife. Let the bread cool completely before slicing to avoid a gummy interior. -
Is this bread healthy?
Yes, especially since it contains no preservatives or additives. You control every ingredient that goes in.
Final Thoughts
This 3 Ingredient Artisan Bread is proof that great food doesn’t need to be complicated. With just a little time and three simple ingredients, you can create a loaf that rivals those from the best bakeries. It’s perfect for anyone looking to enjoy wholesome, homemade bread with minimal effort.
Whether you’re dipping it into olive oil, serving it with soup, or using it for sandwiches, this bread will quickly become a staple in your kitchen.
If you haven’t tried baking bread at home before, this is your sign. Once you taste your first homemade loaf, you’ll wonder why you didn’t start sooner.
Related posts:
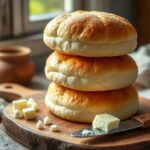 Fluffy Cottage Cheese Cloud Bread Recipe


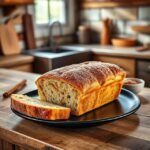 Cinnamon Donut Bread Recipe: A Sweet Twist You’ll Fall in Love With

 Sweet Alabama Pecan Bread Recipe

