
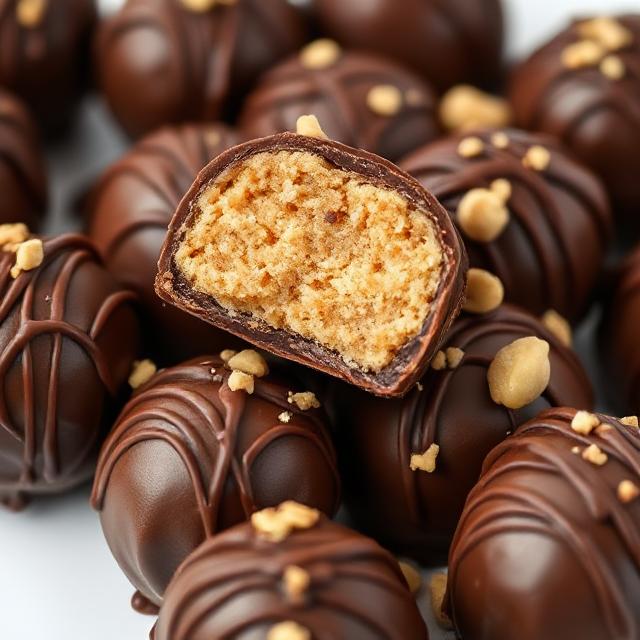

If you’re a peanut butter lover or just someone who can’t resist a chocolatey, bite-sized treat, then this Irresistible Peanut Butter Truffles Recipe is just for you. These no-bake delights are rich, creamy, and coated in a smooth chocolate shell that will make your taste buds dance. Perfect for holidays, special occasions, or simply satisfying that sweet tooth on a quiet night in.
In this post, you’ll learn exactly how to make them from scratch, get helpful tips to perfect the recipe, and find answers to common questions others have about making the perfect truffle. Let’s dive in!
Why You’ll Love These Peanut Butter Truffles
-
No Baking Required – A quick and easy treat made without turning on the oven
-
Simple Ingredients – Just a few pantry staples are all you need
-
Delicious Contrast – Creamy peanut butter filling meets rich chocolate coating
-
Great for Gifting or Parties – Elegant enough for events, easy enough for every day
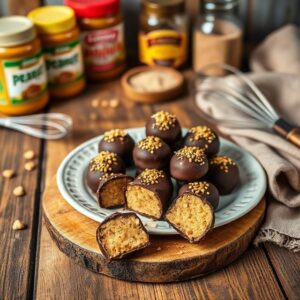
Ingredients You’ll Need
Here’s what you’ll need to make about 20–24 truffles:
-
1 cup creamy peanut butter (natural or classic, unsweetened preferred)
-
1/4 cup unsalted butter, softened
-
1 teaspoon vanilla extract
-
2 cups powdered sugar
-
2 cups semi-sweet or dark chocolate chips (for coating)
-
1 tablespoon coconut oil (optional, helps smooth the melted chocolate)
Optional toppings:
-
Crushed peanuts
-
Sea salt flakes
-
Sprinkles
-
Chocolate drizzle
Step-by-Step Instructions
1. Prepare the Filling
In a medium bowl, combine the peanut butter, softened butter, and vanilla extract. Mix until smooth and well blended. Slowly add the powdered sugar, stirring until a soft dough forms. It should be firm enough to roll into balls without sticking to your hands.
Tip: If it’s too soft, refrigerate the mixture for 15–20 minutes to firm up.
2. Roll into Balls
Using a small cookie scoop or tablespoon, portion the dough and roll it into balls. Place them on a parchment-lined baking sheet.
3. Chill the Truffles
Refrigerate the rolled truffles for at least 30 minutes. This will make them easier to dip in chocolate later.
4. Melt the Chocolate
In a microwave-safe bowl or using a double boiler, melt the chocolate chips with the coconut oil until smooth. Stir frequently to avoid burning.
5. Dip and Decorate
Using a fork or toothpick, dip each chilled truffle into the melted chocolate, gently tapping to remove excess. Place back on the parchment-lined tray. While the coating is still wet, sprinkle on your desired toppings.
6. Let Them Set
Refrigerate again for about 15–20 minutes, or until the chocolate is completely set. Then transfer to an airtight container and store in the fridge or freezer.
Storage Tips
-
Refrigerator: Store in an airtight container for up to 2 weeks
-
Freezer: These truffles freeze beautifully! Place in a sealed bag or container and enjoy for up to 3 months
How to Make Them Healthier
Want a healthier spin? Try these swaps:
-
Use natural peanut butter without added sugar or oils
-
Swap powdered sugar with a powdered sugar alternative like Swerve or monk fruit sweetener
-
Use dark chocolate (70% cacao or more) for less sugar and more antioxidants
Ways to Customize the Recipe
You can easily switch things up to suit your taste or occasion:
-
Add crushed graham crackers or oats to the filling for texture
-
Stir in mini chocolate chips or rice crisps for crunch
-
Flavor the filling with a touch of cinnamon or maple extract
-
Dip in white chocolate or drizzle both white and dark for a fancy twist
Perfect for Every Occasion
These peanut butter truffles are a versatile treat. Make them for:
-
Holiday cookie trays
-
Birthday parties
-
Valentine’s Day gifts
-
Wedding dessert tables
-
Just because you want something amazing!
15 Frequently Asked Questions (FAQs)
1. Can I use crunchy peanut butter?
Yes, but it will change the texture. Crunchy peanut butter adds a nice crunch but won’t be as smooth.
2. What if I don’t have coconut oil?
You can melt chocolate without it, but coconut oil gives it a smoother finish and helps it set better.
3. Can I use white chocolate instead of dark?
Absolutely! White chocolate is sweeter and gives a different but delicious flavor.
4. Do I need a mixer for this recipe?
No, you can mix everything by hand, though a hand mixer makes it quicker and easier.
5. How long do they last?
In the fridge: up to 2 weeks. In the freezer: up to 3 months.
6. Are these gluten-free?
Yes! All ingredients are naturally gluten-free, but check your chocolate chips just to be safe.
7. Can I add protein powder?
Yes, add a scoop to the filling. You may need less powdered sugar to balance the texture.
8. Can I skip the chilling step?
It’s not recommended. Chilling helps the truffles stay firm and coat evenly.
9. Can kids make this recipe?
Yes! It’s a fun, no-bake recipe that’s great for involving kids with adult supervision for melting chocolate.
10. Can I double the recipe?
Definitely. This recipe scales well for larger batches.
11. Why are my truffles oily or sticky?
You may have used a peanut butter with too much oil. Try refrigerating the dough before rolling.
12. What’s the best way to coat them in chocolate?
Use a fork or dipping tool, gently lower them into the chocolate, and tap off excess.
13. Can I gift these truffles?
Yes! Package them in mini cupcake liners inside a gift box for a professional look.
14. Do I have to refrigerate them after coating?
Yes, to help the chocolate set properly and keep their shape.
15. Can I make these dairy-free?
Yes! Use dairy-free butter and vegan chocolate chips.
Final Thoughts
These Irresistible Peanut Butter Truffles are more than just a quick dessert — they’re a crowd-pleasing, indulgent treat made with love. Whether you’re new to the kitchen or a seasoned baker, you’ll find this recipe simple, flexible, and delicious every time.
Ready to impress your family, guests, or just yourself? Give this recipe a try, and don’t forget to share your creations online!
Looking for more mouthwatering dessert recipes like this one? Follow us on Pinterest so that you will not miss whenever we posted the next recipe. Thanks!

Irresistible Peanut Butter Truffles Recipe
Ingredients
For the filling:
- 1 cup creamy peanut butter unsweetened preferred
- 1/4 cup unsalted butter softened
- 1 teaspoon vanilla extract
- 2 cups powdered sugar
For the chocolate coating:
- 2 cups semi-sweet or dark chocolate chips
- 1 tablespoon coconut oil optional, for smoother melting
Optional toppings:
- Crushed peanuts
- Sea salt flakes
- Sprinkles
- Extra melted chocolate for drizzling
Instructions
- Make the Peanut Butter Dough: In a medium bowl, mix together the peanut butter, softened butter, and vanilla extract until smooth and creamy. Gradually stir in the powdered sugar until a firm dough forms.
- Shape the Truffles: Scoop tablespoon-sized portions of the mixture and roll them into balls. Place each ball onto a parchment-lined baking sheet.
- Chill: Refrigerate the truffles for 30 minutes, or until firm enough for dipping.
- Melt the Chocolate: In a microwave-safe bowl or double boiler, melt the chocolate chips with the coconut oil. Stir until smooth.
- Dip the Truffles: Use a fork or toothpick to dip each truffle into the melted chocolate, coating it completely. Let any excess chocolate drip off, then place the coated truffle back on the parchment paper.
- Add Toppings (Optional): While the chocolate is still wet, sprinkle with crushed peanuts, sea salt, or other toppings if desired.
- Chill Again: Refrigerate the truffles for another 15–20 minutes, or until the chocolate is fully set.
- Serve or Store: Enjoy immediately, or store in an airtight container in the fridge for up to 2 weeks—or freeze for up to 3 months.
Related posts:


 Irresistible Blueberry Lime Cheesecake Cupcakes Recipe

 Garlic Butter Steak Tips with Cheesy Rigatoni Recipe

 Honey Butter Cornbread Poppers Recipe
 Garlic Butter Steak Parmesan Rigatoni