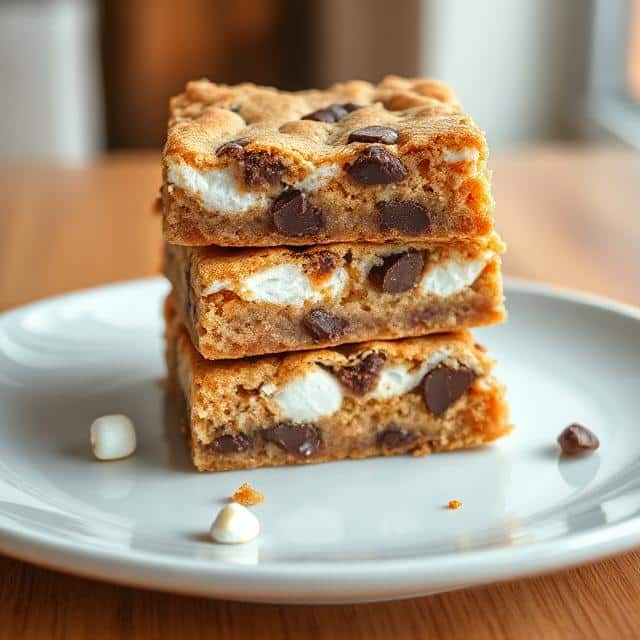
S’mores have long been a nostalgic treat associated with campfires, summer nights, and sweet memories. But what if you could enjoy all the magic of s’mores — the melted chocolate, gooey marshmallows, and crunchy graham crackers — in one easy-to-make, oven-baked dessert? That’s where S’More Cookie Bars come in.
These bars are the perfect combination of a chewy cookie and the classic s’more. Whether you’re hosting a party, baking with kids, or just craving a decadent homemade dessert, these cookie bars will hit the spot. They’re rich, delicious, colorful, and oh-so-addictive.
In this article, we’ll walk you through everything you need to know about making S’More Cookie Bars — from ingredients and baking tips to frequently asked questions and storage advice.
What Are S’More Cookie Bars?
S’More Cookie Bars are a baked dessert that combines the essential ingredients of traditional s’mores — graham crackers, chocolate, and marshmallows — with the comforting texture of a cookie bar. Instead of toasting marshmallows over an open flame, you bake everything in layers, allowing the ingredients to meld together in a golden, gooey perfection.
They’re the perfect answer to s’mores cravings when you can’t get to a campfire. Plus, they’re easier to serve and much less messy!
Why You’ll Love This Recipe
-
Easy to Make: Everything goes into one pan and gets baked in the oven. No special equipment required.
-
Perfect for Sharing: These bars are great for parties, potlucks, bake sales, or as lunchbox treats.
-
Year-Round Treat: You don’t need a fire pit or camping trip to enjoy s’mores anymore.
-
Customizable: Use different types of chocolate, add peanut butter, or try different cookies for fun variations.
-
Crowd Favorite: From kids to adults, everyone loves the gooey, rich texture and sweet flavors.
Ingredients You’ll Need
Here’s a breakdown of the key ingredients used in S’More Cookie Bars:
-
Graham Cracker Crumbs: These form the classic s’mores base and add a toasty crunch.
-
Unsalted Butter: Adds richness and helps hold the crust together.
-
Brown Sugar: For a slightly molasses-like depth of flavor.
-
All-Purpose Flour: The base for the cookie dough.
-
Baking Powder & Baking Soda: Helps the dough rise and stay chewy.
-
Salt: Enhances all the other flavors.
-
Eggs: For structure and moisture.
-
Vanilla Extract: Adds warmth and aroma.
-
Mini Marshmallows: The gooey signature of any s’mores dessert.
-
Chocolate Chips or Chunks: Use milk, dark, or semi-sweet — your choice.
-
Crushed Graham Crackers (optional for topping): Adds extra crunch and visual appeal.
How to Make S’More Cookie Bars
Step 1: Prep the Oven and Pan
Preheat your oven to 350°F (175°C). Line a 9×13-inch baking dish with parchment paper or lightly grease it with butter or non-stick spray.
Step 2: Make the Crust
In a bowl, mix graham cracker crumbs with melted butter and a little brown sugar. Press this mixture evenly into the bottom of your prepared pan to form the base.
Step 3: Make the Cookie Dough
In a separate mixing bowl, beat together softened butter and brown sugar until creamy. Add eggs and vanilla extract, then stir in the dry ingredients: flour, baking soda, baking powder, and salt.
Step 4: Add the Good Stuff
Gently fold in chocolate chips and mini marshmallows into the dough. Spread this mixture over the graham cracker crust using a spatula.
Step 5: Bake
Bake for 25–30 minutes or until the top is golden brown and slightly firm to the touch. The marshmallows will bubble, and the chocolate will melt beautifully.
Step 6: Cool and Slice
Let the bars cool in the pan for at least 30 minutes before slicing into squares. This allows everything to set and makes slicing easier.
Tips for Perfect Cookie Bars
-
Don’t overbake. They should be slightly gooey when you remove them from the oven — they’ll continue to set as they cool.
-
Use parchment paper to lift the bars out easily and slice them cleanly.
-
Let the kids help with adding marshmallows and chocolate — it’s fun and messy in the best way.
-
Store leftovers in an airtight container at room temperature for up to 4 days.
Variations You Can Try
-
Peanut Butter S’More Bars: Swirl in peanut butter to the cookie dough for a salty-sweet twist.
-
Nutella Swirl: Drop dollops of Nutella before baking and swirl them in with a knife.
-
White Chocolate or Butterscotch Chips: Mix things up with different flavored chips.
-
Gluten-Free Option: Use gluten-free graham crackers and a 1:1 gluten-free flour blend.
Frequently Asked Questions (FAQs)
-
Can I use large marshmallows instead of mini ones?
Yes, but chop them into smaller pieces so they melt evenly and don’t overwhelm the dough. -
Can I make these in advance?
Absolutely. These bars store well and can be made a day or two ahead of time. -
Should I refrigerate the cookie bars?
No, room temperature is best. Refrigeration can make them too hard. -
Can I freeze S’More Cookie Bars?
Yes, once cooled and sliced, wrap them tightly and freeze for up to 2 months. -
What type of chocolate works best?
Semi-sweet chocolate chips are classic, but you can also use milk or dark chocolate chunks for a richer taste. -
How do I prevent marshmallows from burning?
Keep an eye on them during the last few minutes of baking. If they’re browning too fast, tent the top with foil. -
Can I use a different pan size?
Yes, but adjust the baking time. A smaller pan may need a few extra minutes. -
What makes these bars chewy?
Brown sugar and butter contribute to their chewy texture. Avoid overbaking for maximum gooeyness. -
Can I add nuts to this recipe?
Sure! Chopped pecans or walnuts add a nice crunch. -
How can I make them more colorful for parties?
Top with rainbow sprinkles or colorful candy-coated chocolate pieces before baking. -
Are these safe for kids to make?
Yes, with supervision. It’s a fun family baking activity! -
Can I use cookie dough from the store?
You can, but making it from scratch gives better control over flavor and texture.
Conclusion
S’More Cookie Bars are the ultimate comfort dessert — easy to make, fun to customize, and guaranteed to disappear fast. Whether you’re baking them for a special occasion or a simple weeknight indulgence, they bring all the cozy campfire flavor into your kitchen in the most delicious way.
If you love this recipe, make sure to save it, pin it, and share it with fellow dessert lovers. And for more delicious recipes like this, don’t forget to follow us on Pinterest where we regularly post irresistible treats, baking tips, and colorful food inspiration.


